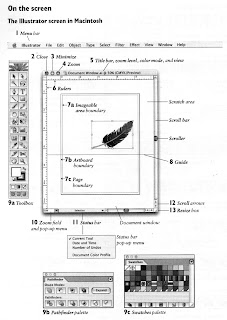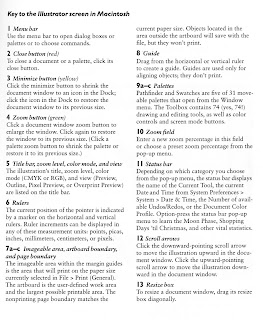


Illustrator creates art out of shapes. These shapes are comprised of paths (the line of edge of a shape) and anchor points (the little boxes along the edge of the shape. By adding to, subtracting from, and stacking various shapes, you can create all kinds of images. Here's a recap of some essentials.
Tools:
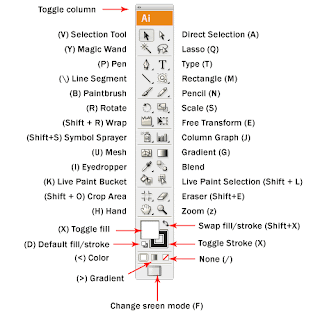
• Selection Arrow (V): Selects shapes in their entirety. Allows you to scale, squash, stretch, move, and change the color/stroke of an object. You can also drag a box around multiple shapes to select multiple shapes at once!
• Direct Selection Arrow (A): Selects a path segment or anchor point, depending on where you click. You can pull the anchor points themselves to distort the shape, or use the handles to adjust the curves. This allows for much greater and precise control over an object than the simple Selection Arrow.
•Ellipse (L), Rectangle (M), and other shapes: Basic shape making tools. Click and drag to make a shape, or simply click and type the shape dimensions in the dialog box. Shapes are always editable.
• Arrange the stacking order of objects by going to the top of your screen and selecting Object > Arrange, then picking which direction you'd like to send the shape(s) in question. The shortcut to send an object back or forward a layer is Command + [ or Command + ].
Handy Mouse and Keyboard Functions:
• Hold the shift key while dragging to create shapes in perfect dimensions (circles, squares, etc.).
• Hold the shift key while moving a shape to move it in perfect alignment vertically or horizontally from its original position.
• Hold the option key while moving a shape to create a duplicate. If you hold shift and option together while moving a shape, you can create a duplicate shape and move it in perfect alignment to the original. Very handy when trying to create orderly rows of identical objects (like stars on a flag)!
Other Useful Bits:
• Templates: In the layers panel, click on the drop down menu to the right of the word "Layers". Select template, then make a new layer above it to work on. This allows you to trace imported images. Remember, the idea is to use imported images as template to base your new art on, not as a part of the art itself.
• To get a better view of what you are tracing, hit Command + Y to go into Outline Mode. Command + Y again takes you back out. If you're stuck, and you don't see any colors or fills in your shapes, you may be in Outline Mode inadvertently. Watch out!
Colors:
• Color is edited on bottom of the toolbox. To edit the color of an object, click on the Fill color box (left box). To edit the outline color of an object, click on the Stroke color box (right box). You can also set either to none, using the None button to the lower right of the Stroke box.
• Pick colors by double clicking on the Fill or Stroke box, then use the picker to select a new color. You can also select colors from the swatch panel on the right side of the screen.
*If you can't find a specific panel in any Adobe program, click on "Window" at the top of the screen, then click on the window that you are looking for.

Congratulation for the great post. Those who come to read your Information will find lots of helpful and informative tips. Air Jordan Trainers
ReplyDelete